When email forwarding is enabled, emails sent to a Cloaked-generated email address will also be forwarded to your everyday email. Similarly, when text forwarding is enabled, any texts you receive or phone calls you get on a Cloaked-generated phone number will be sent to your everyday phone number. Hence, you’ll be able to view emails in your everyday email app (e.g. Gmail), take calls through your device’s phone app itself, and receive and send messages through your device’s native messaging app (e.g. iMessage) while still remaining Cloaked.
1. Log in to the Cloaked dashboard and click on your profile icon.
2. Select ‘Settings’ from the dropdown menu.
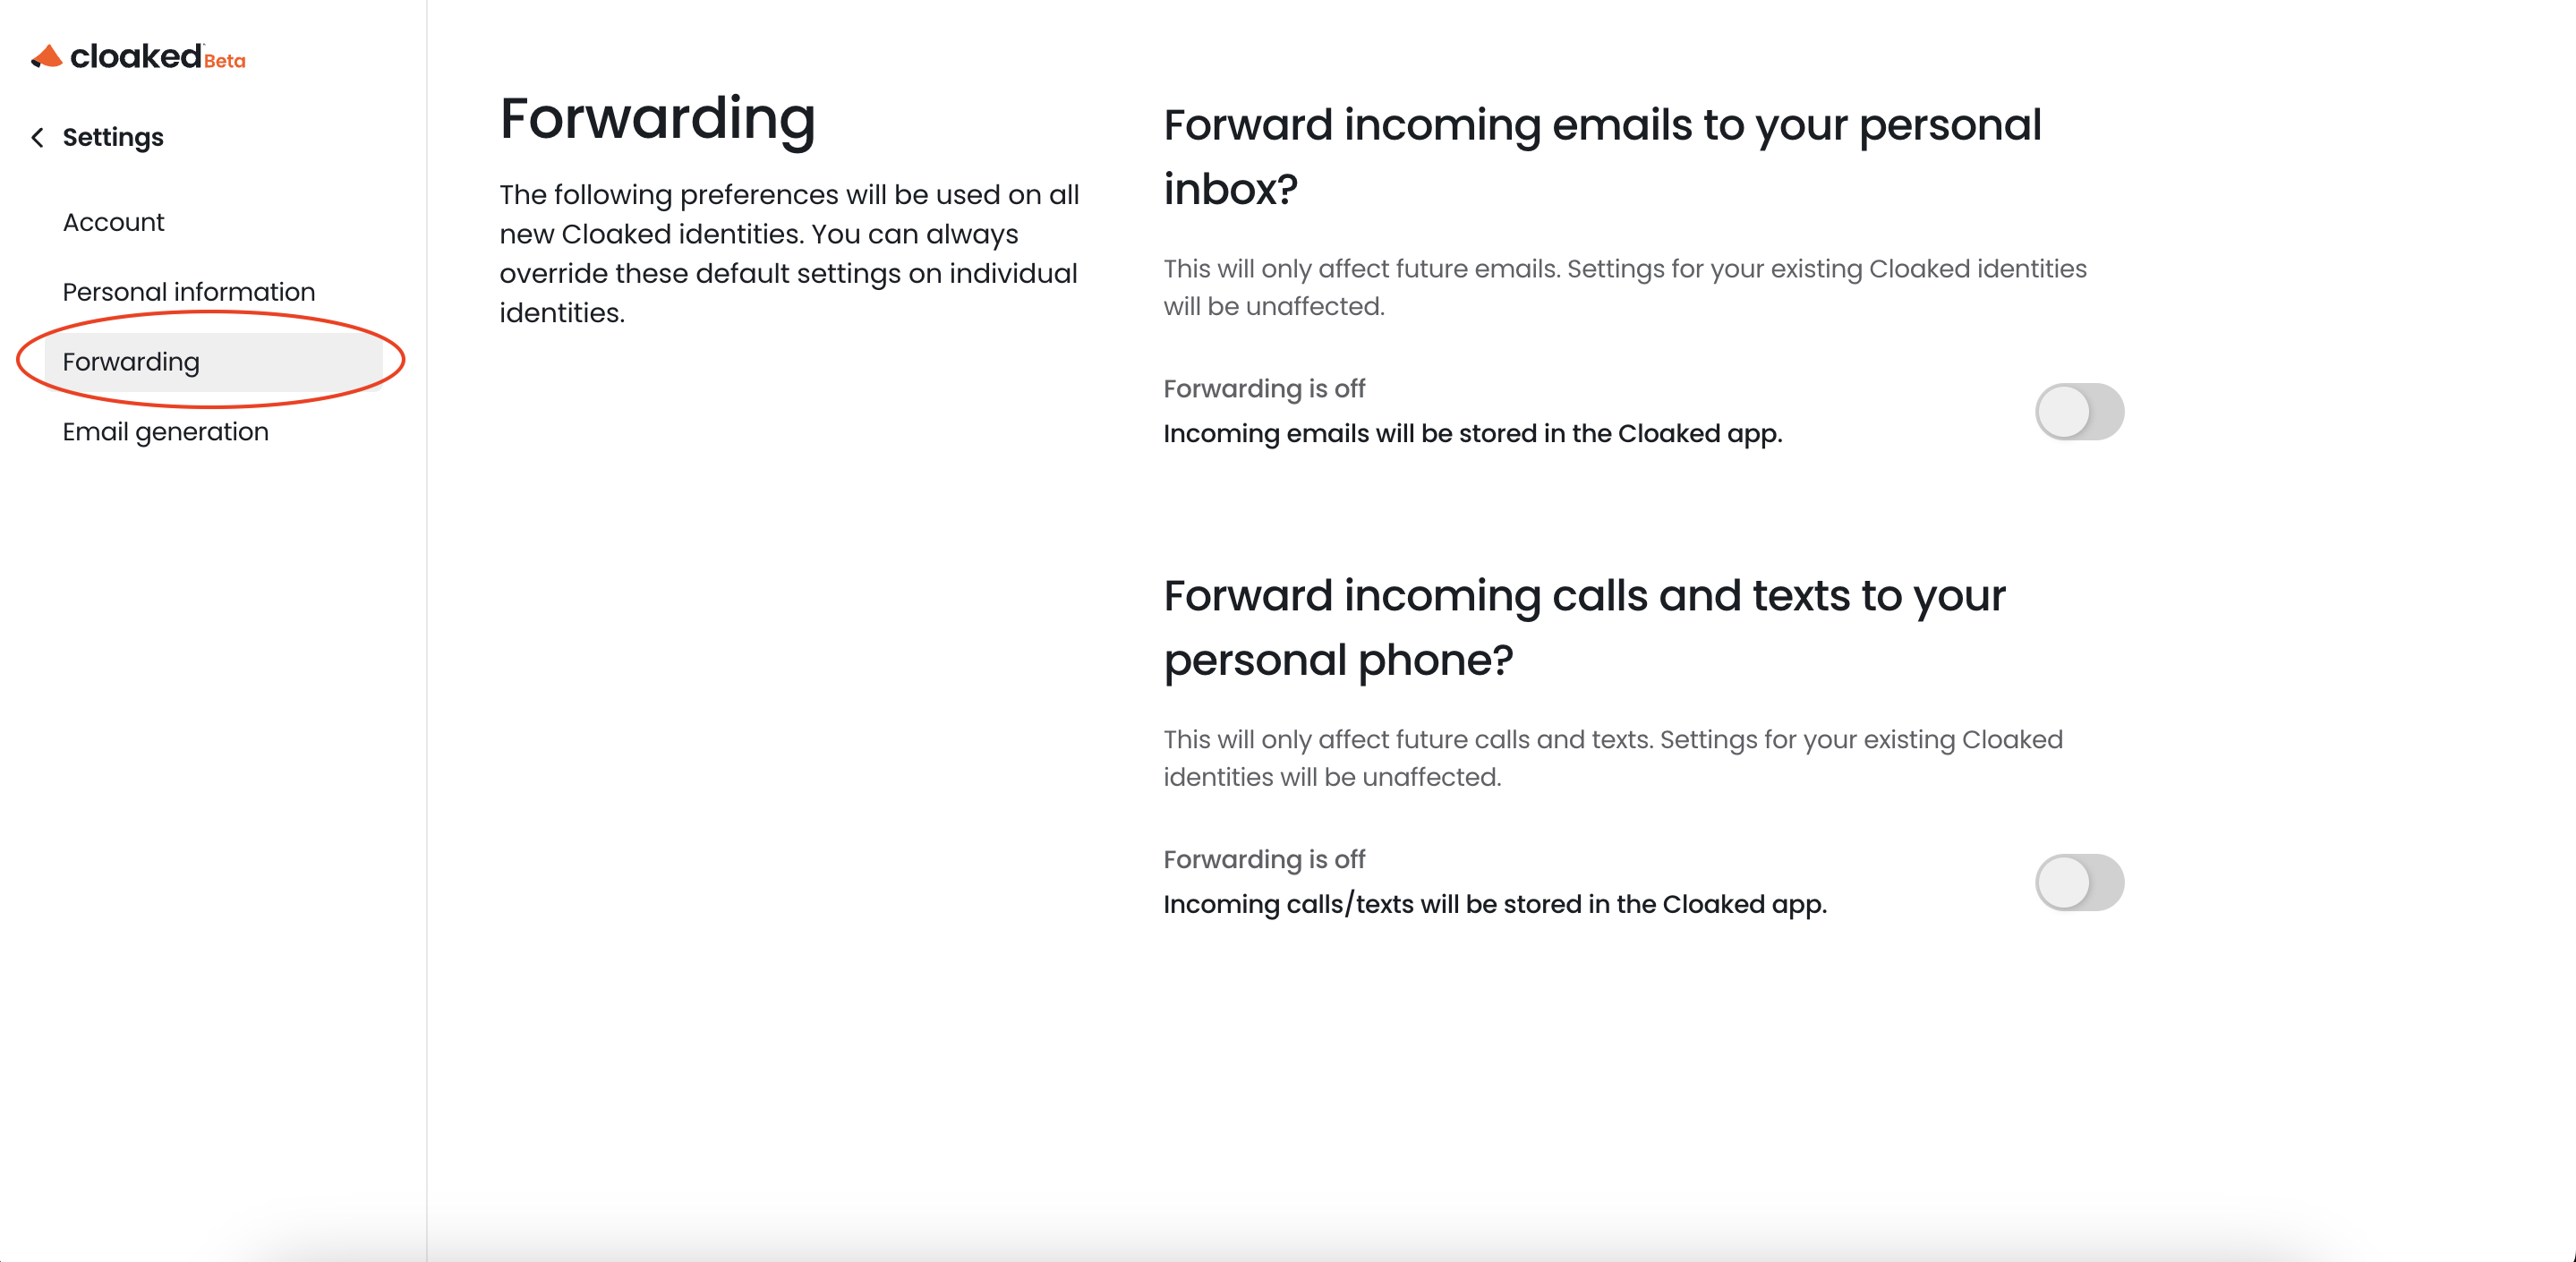
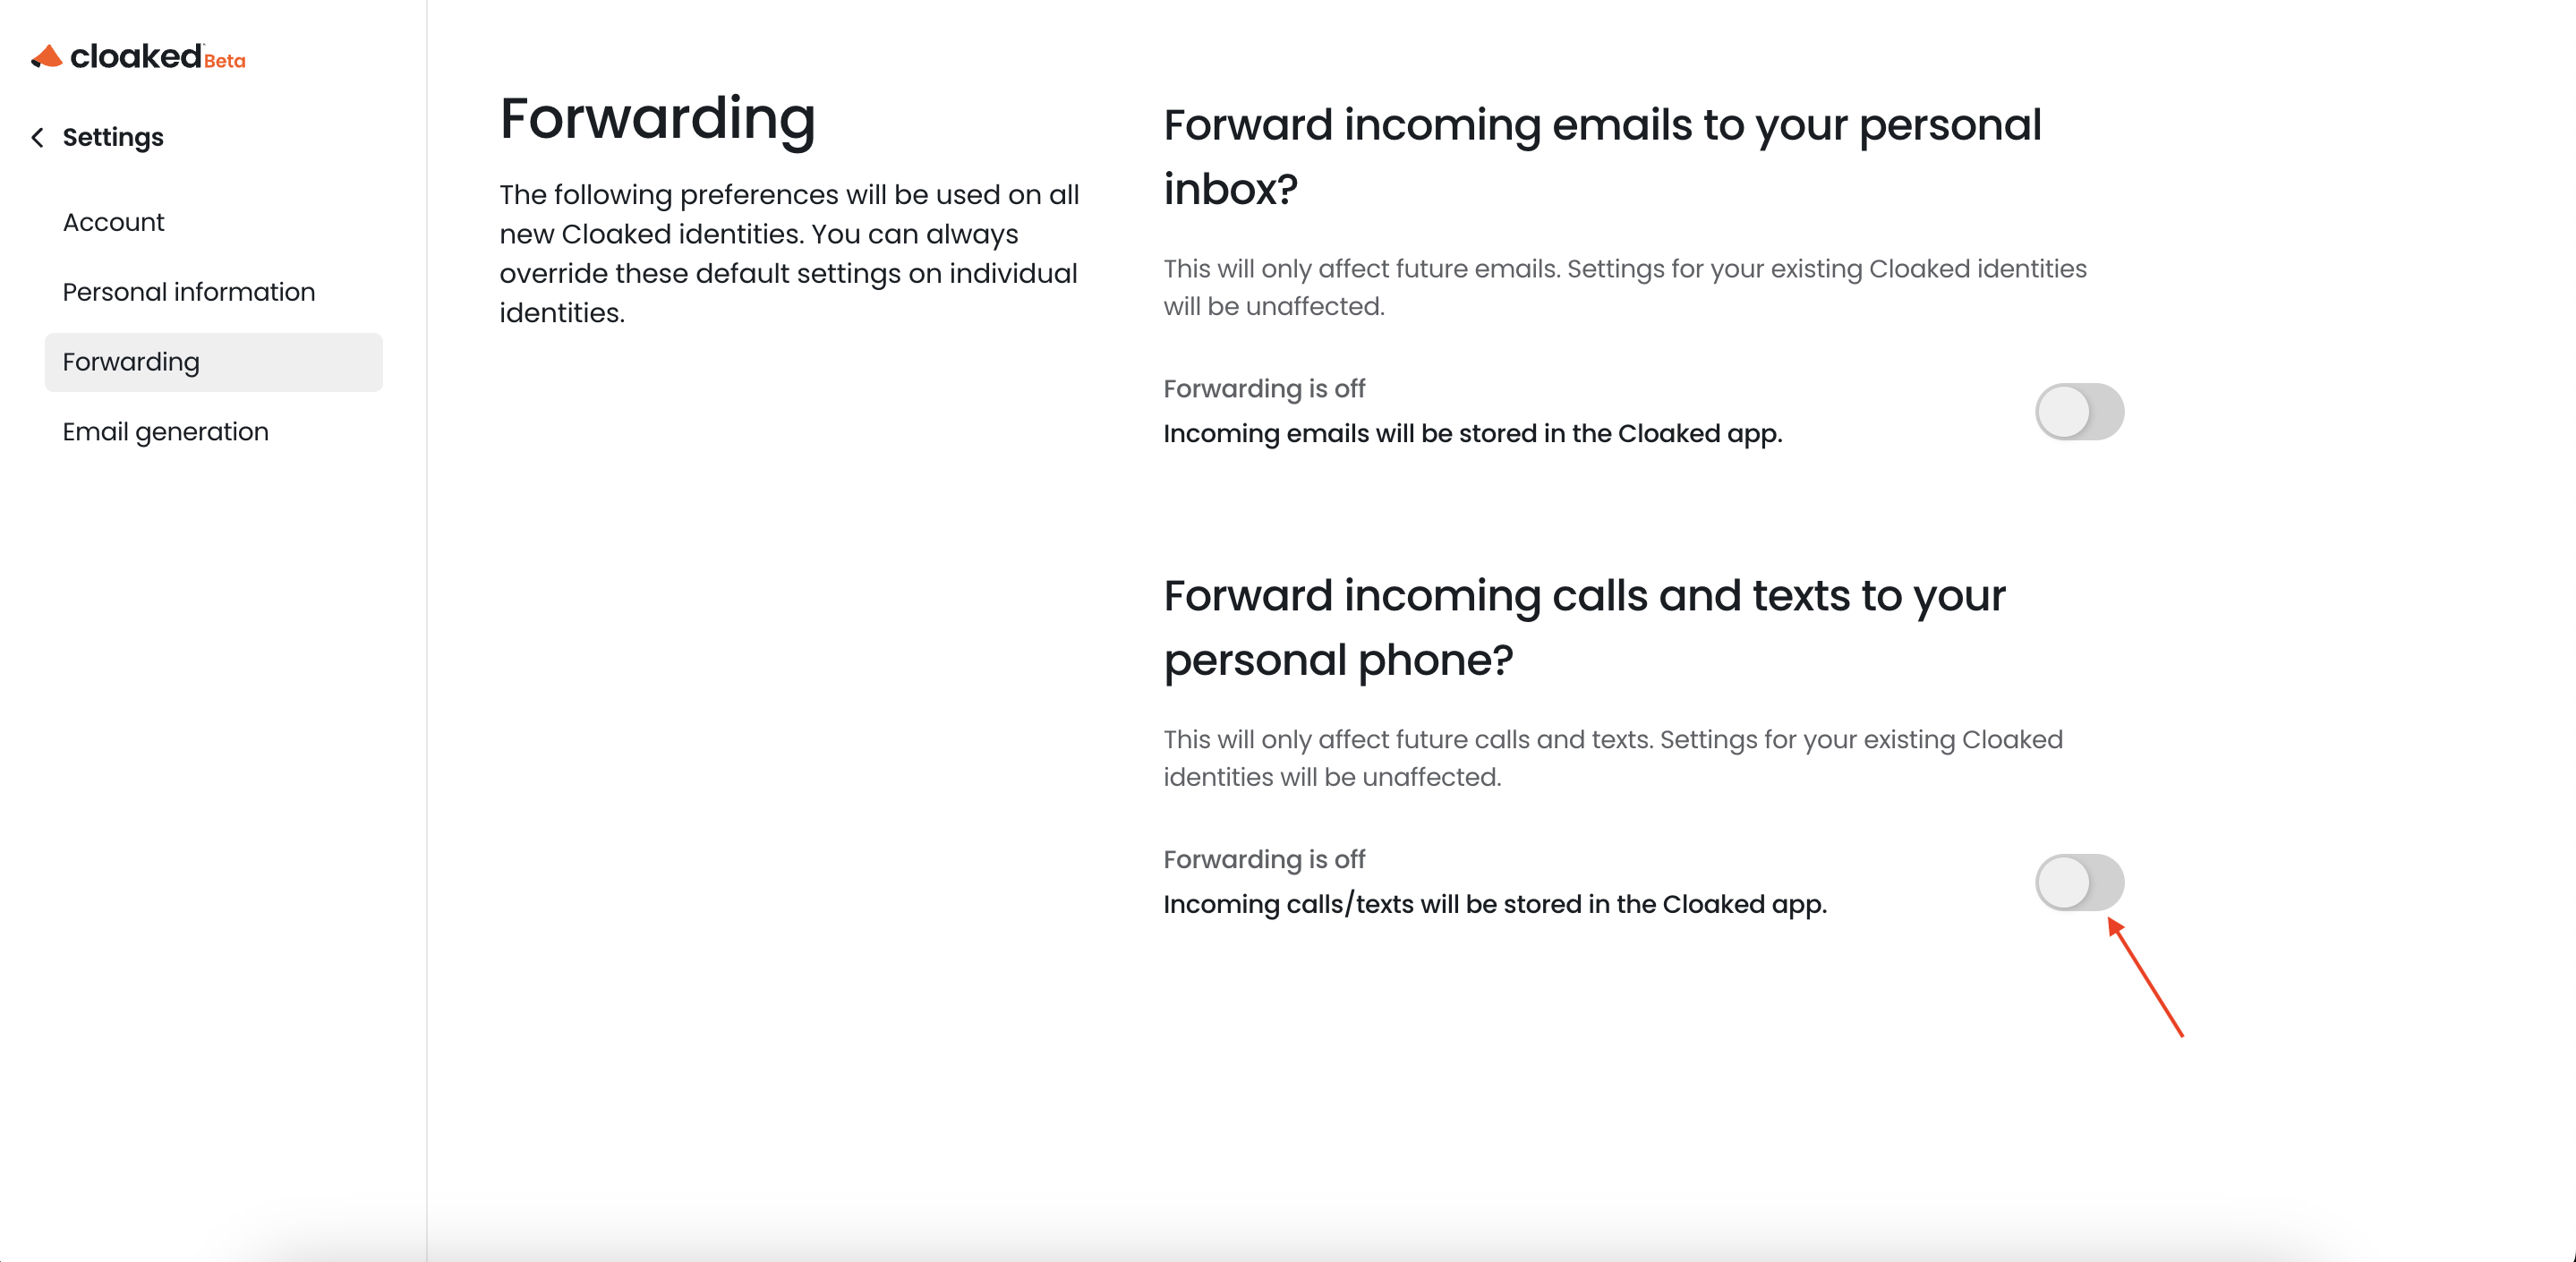
3. Select ‘Forwarding’ from the menu on the left.
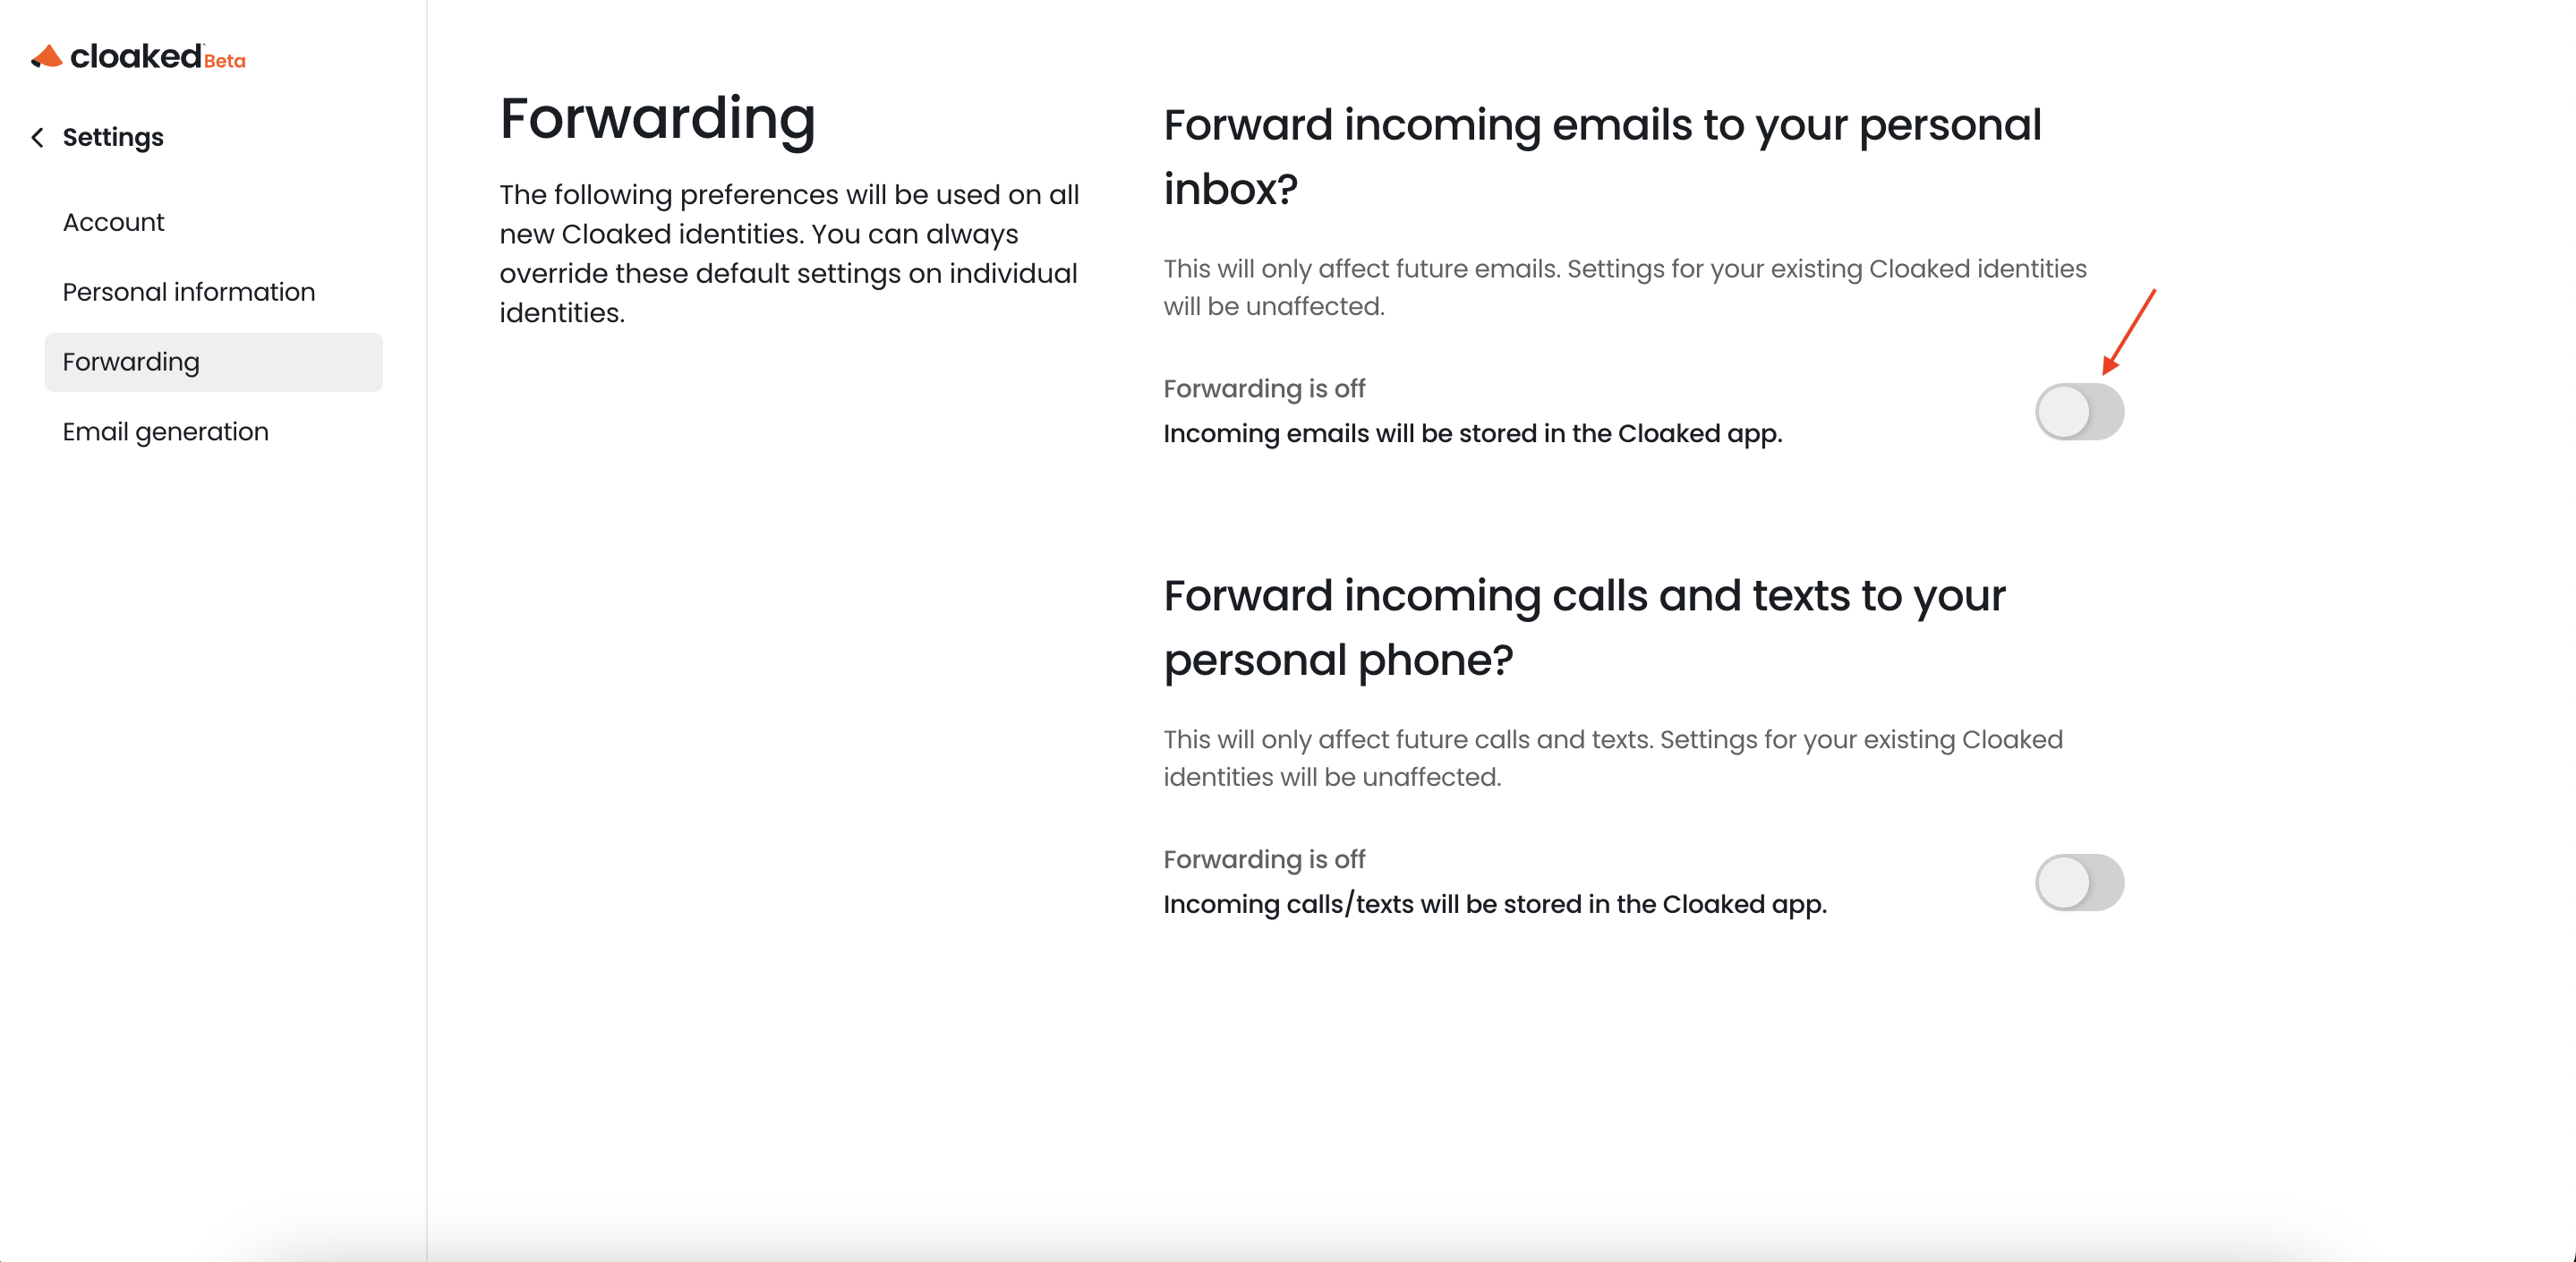
4. Turn on the first toggle to enable email forwarding.
5. Enter the email address you’d like forward emails to.
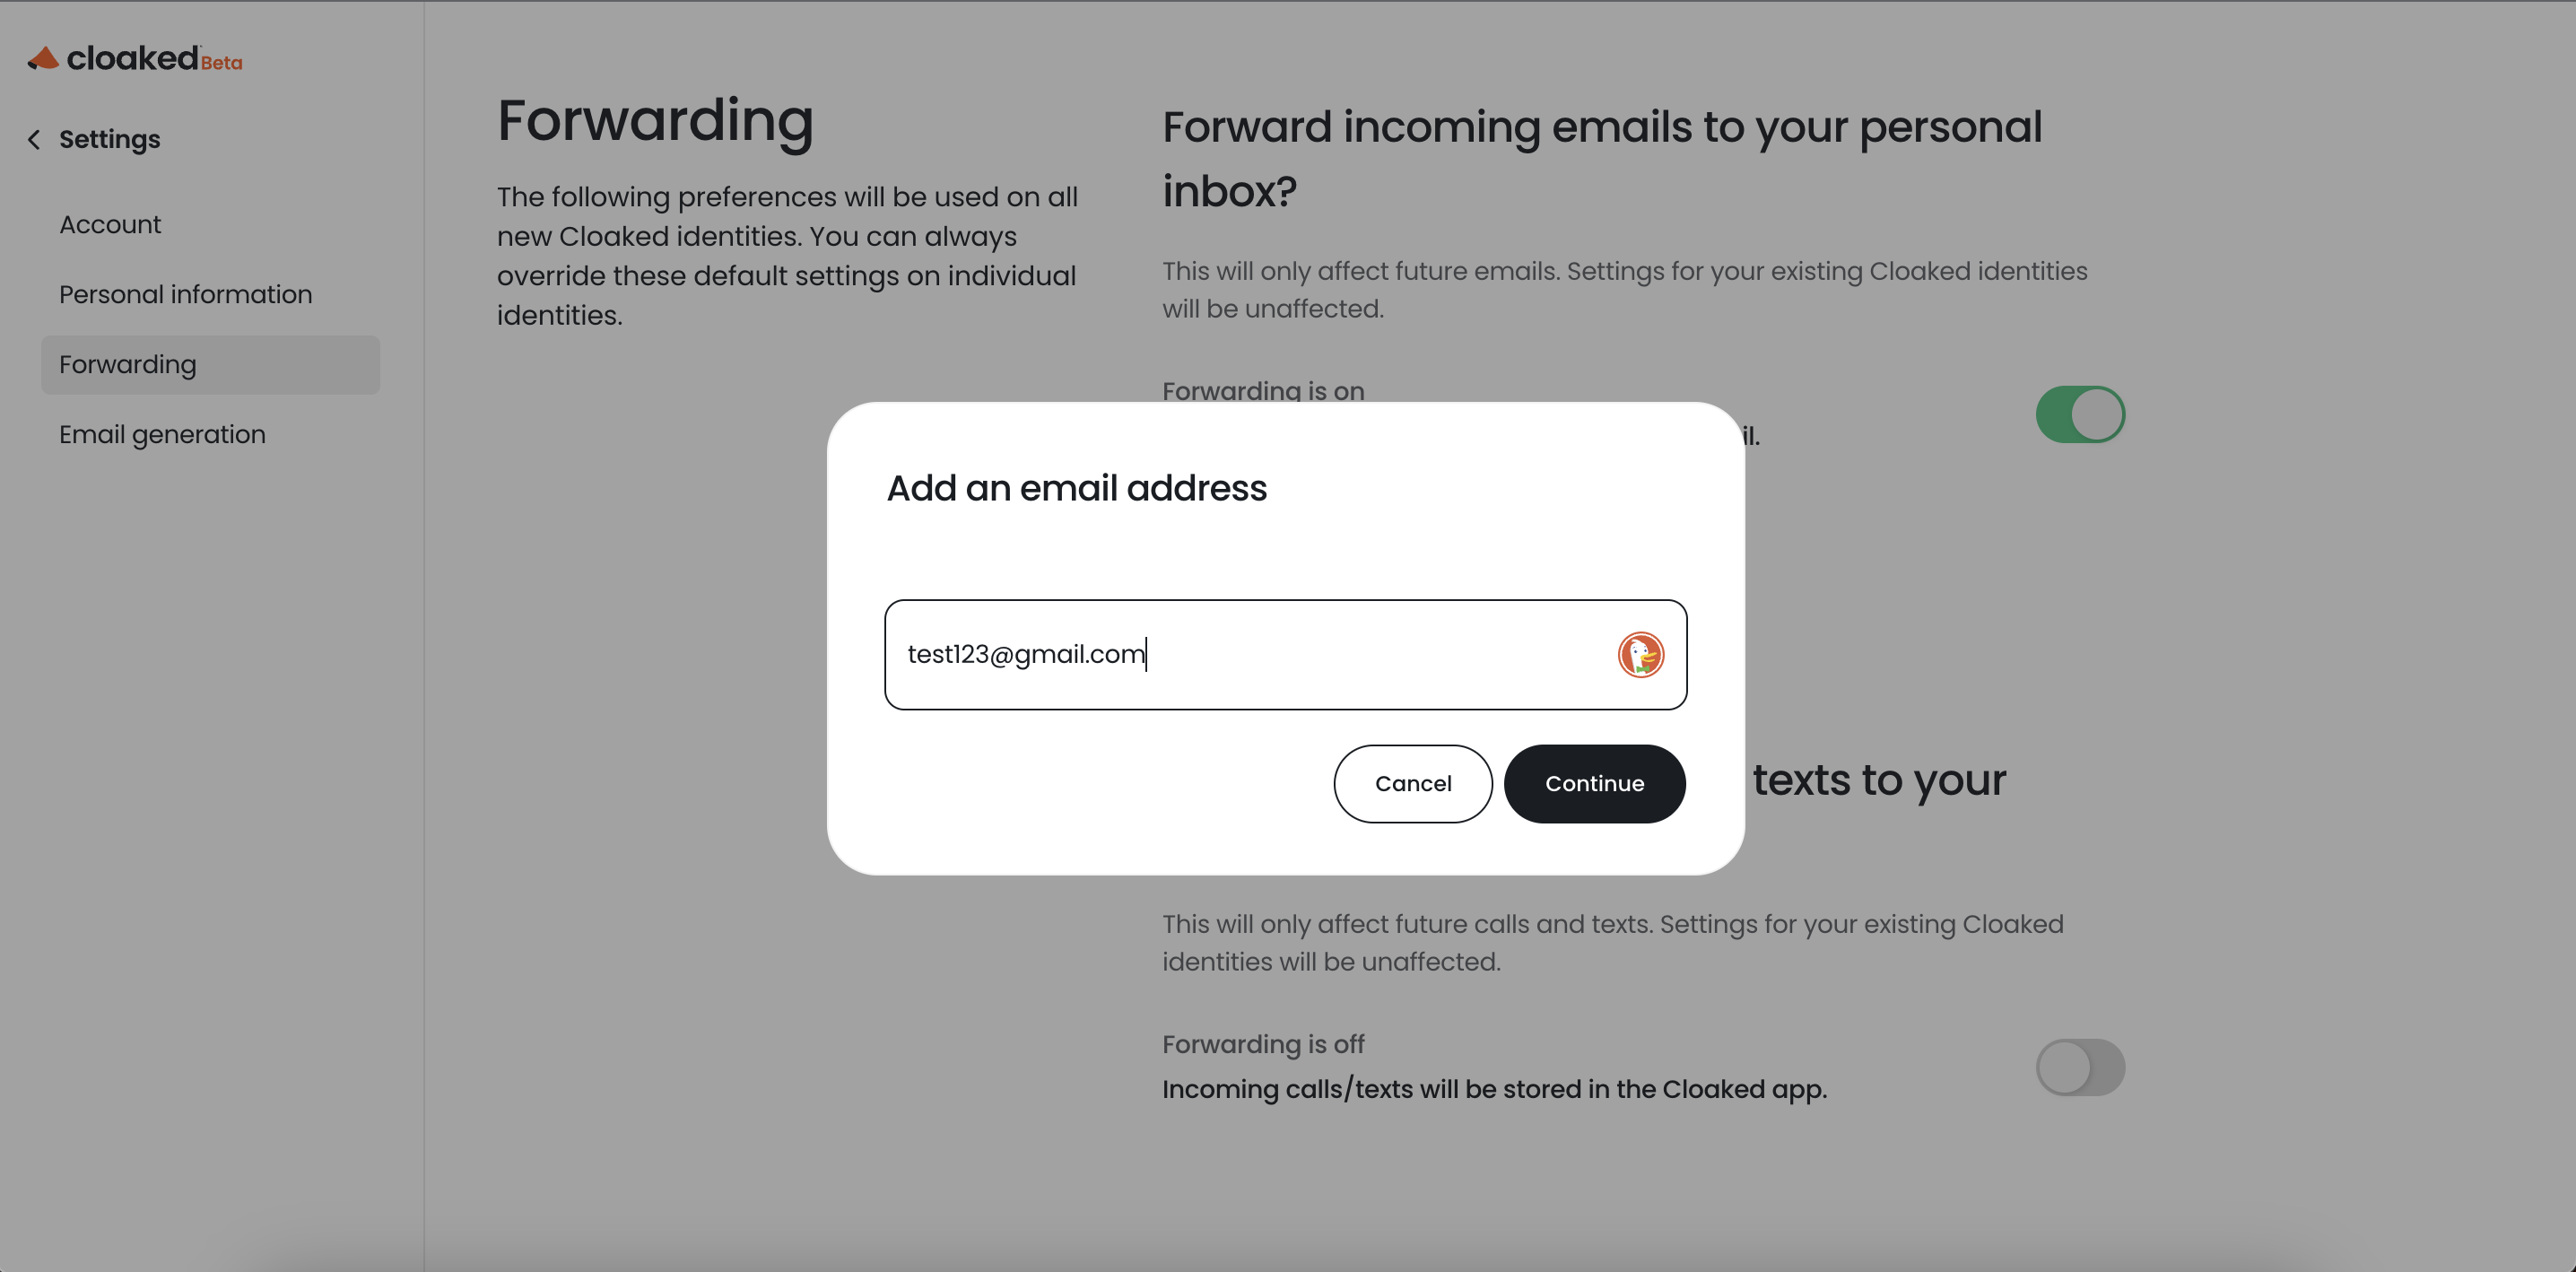
6. After you select “Continue”, you’ll receive a verification code at the email address you provided. Enter the verification code.
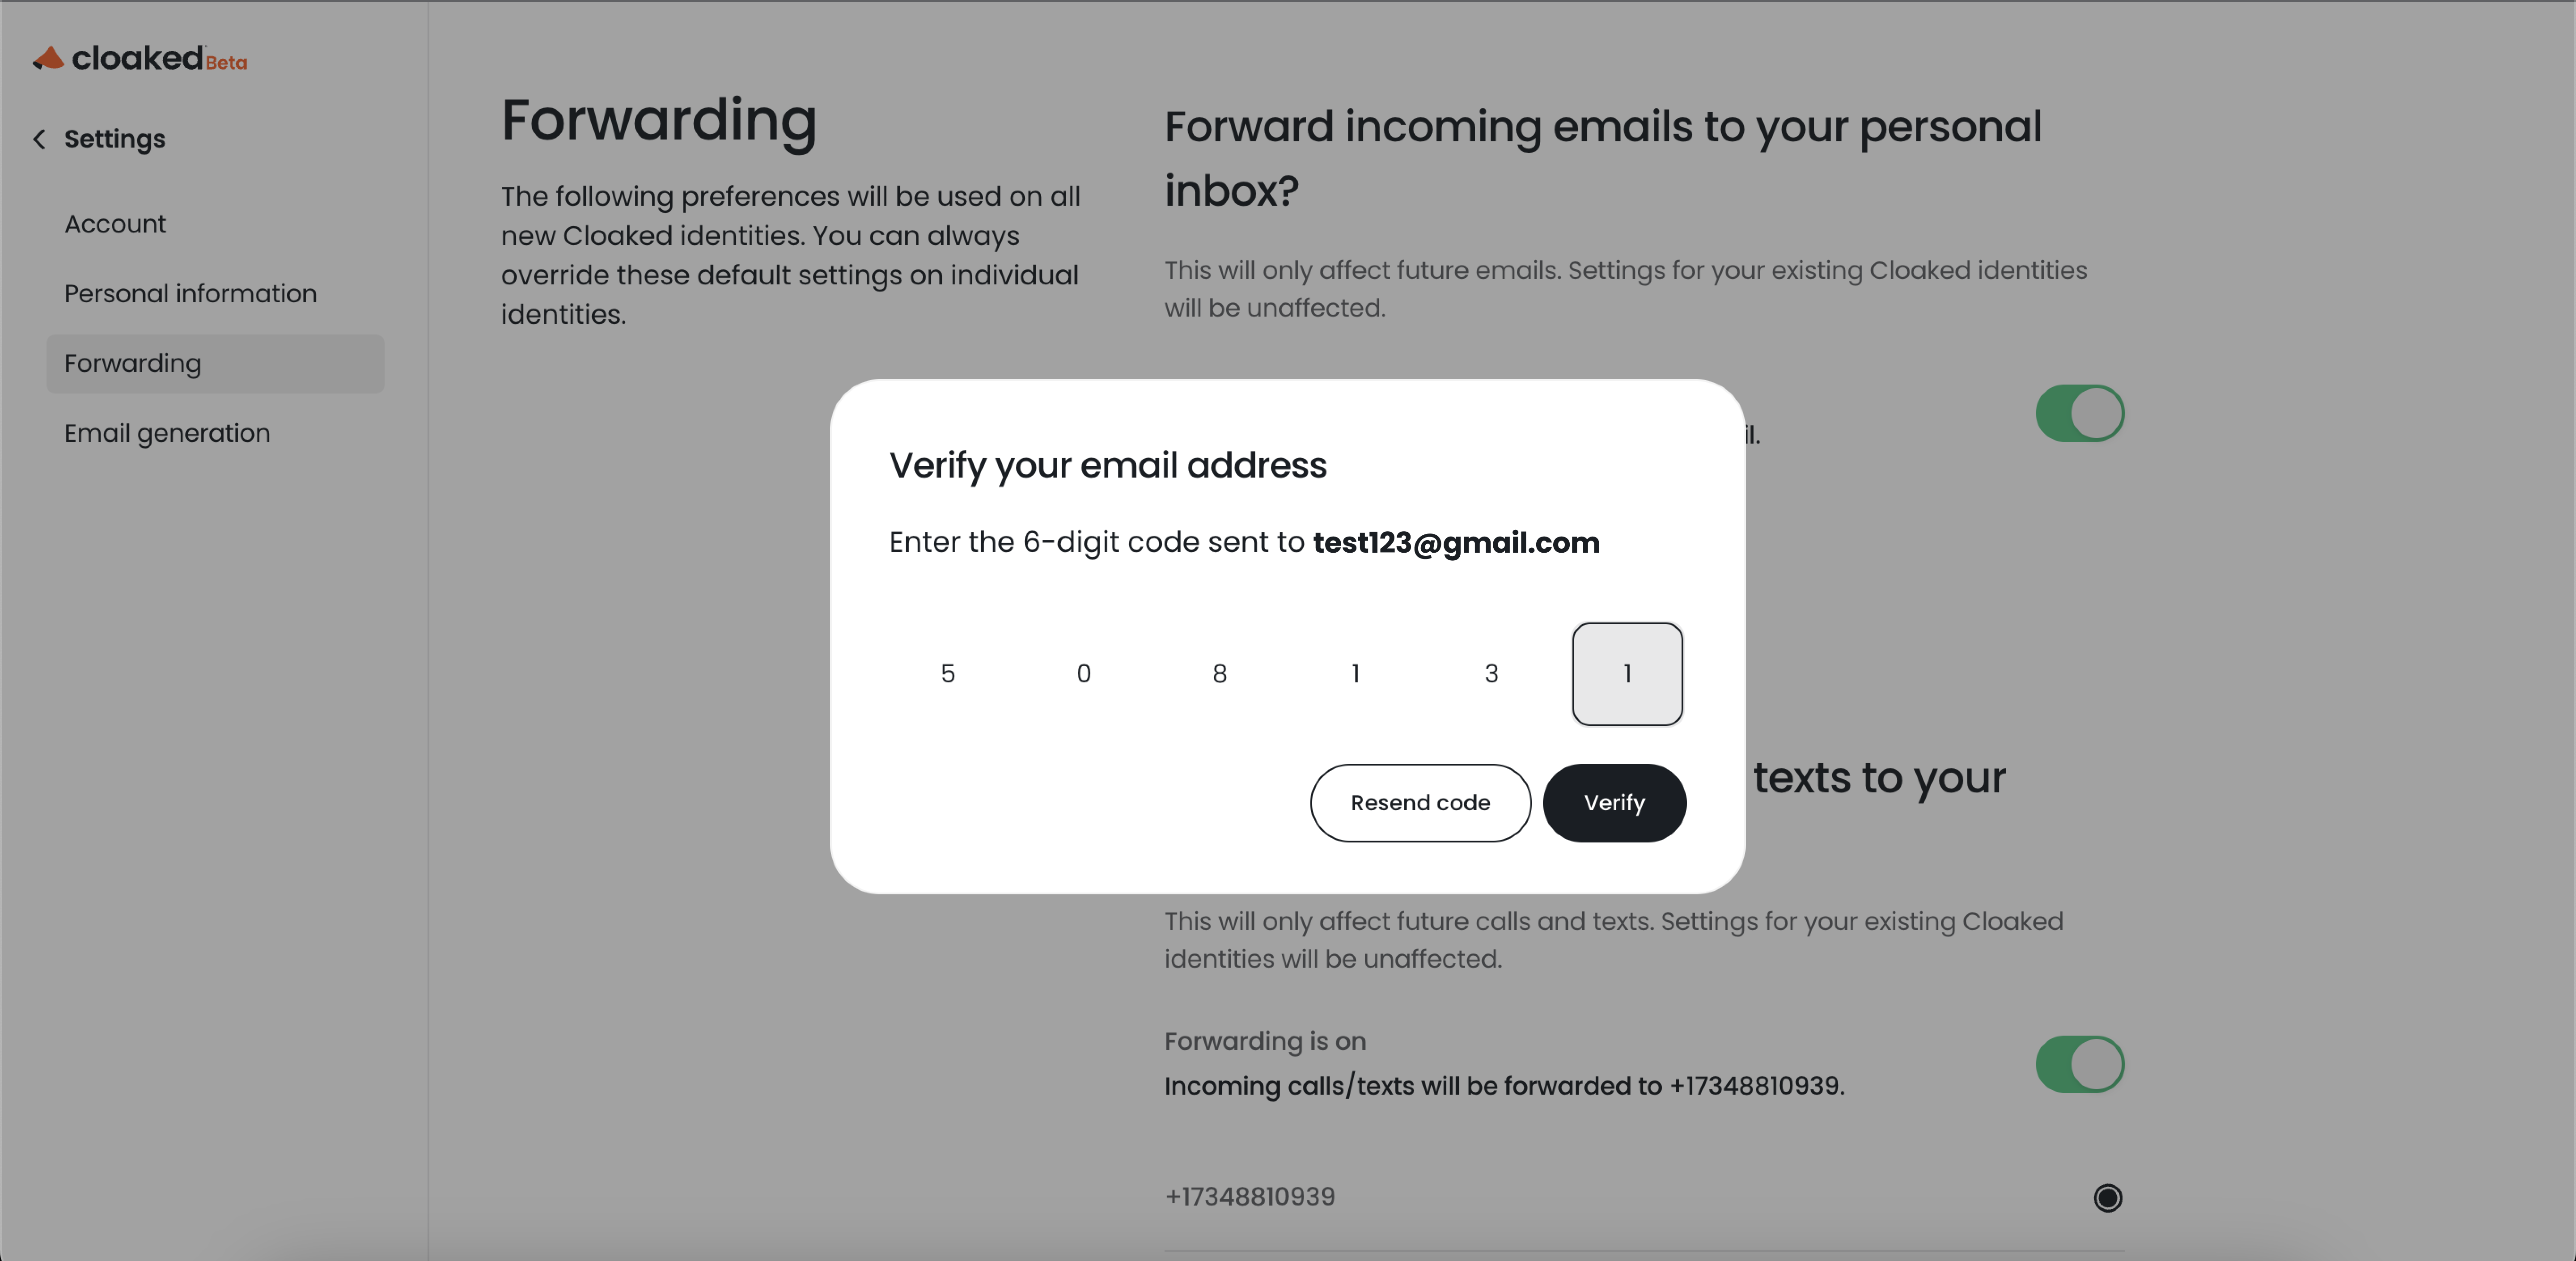
7. Select verify. All emails sent to your Cloaked-generated emails will be forwarded to the email address you provided.
8. Turn on the second toggle to enable text and call forwarding.
9. Enter the phone number you’d like to forward texts and calls to.
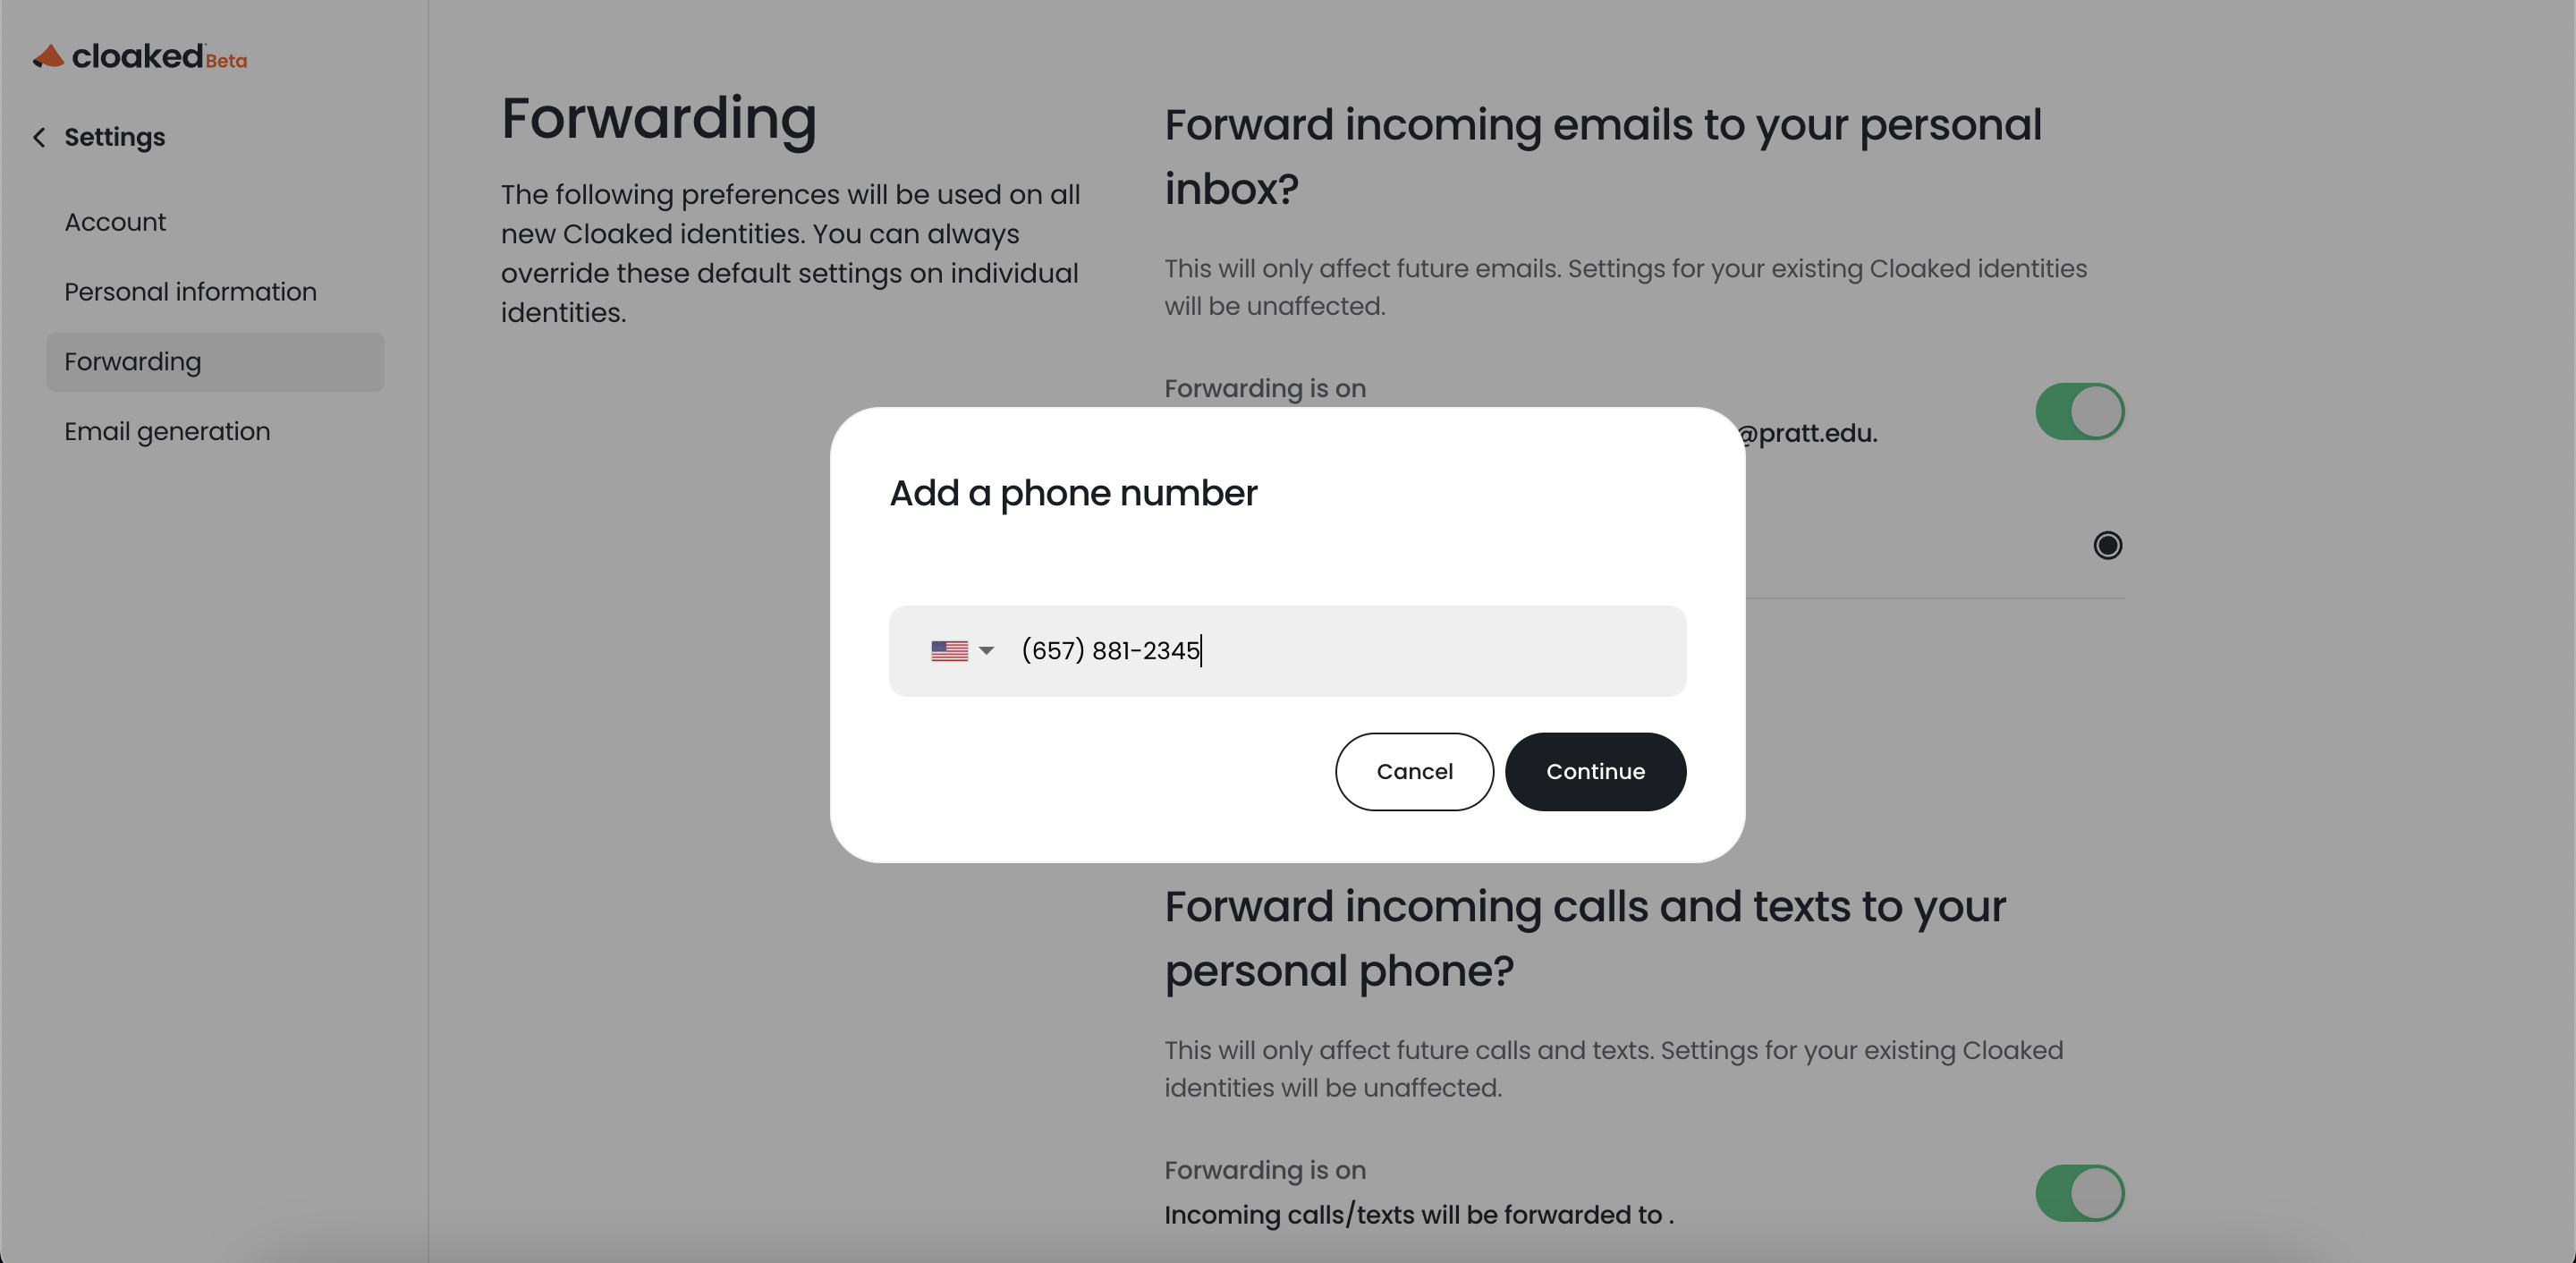
10. After you select “Continue”, you’ll be sent a verification code to the phone number you provided. Enter the verification code.
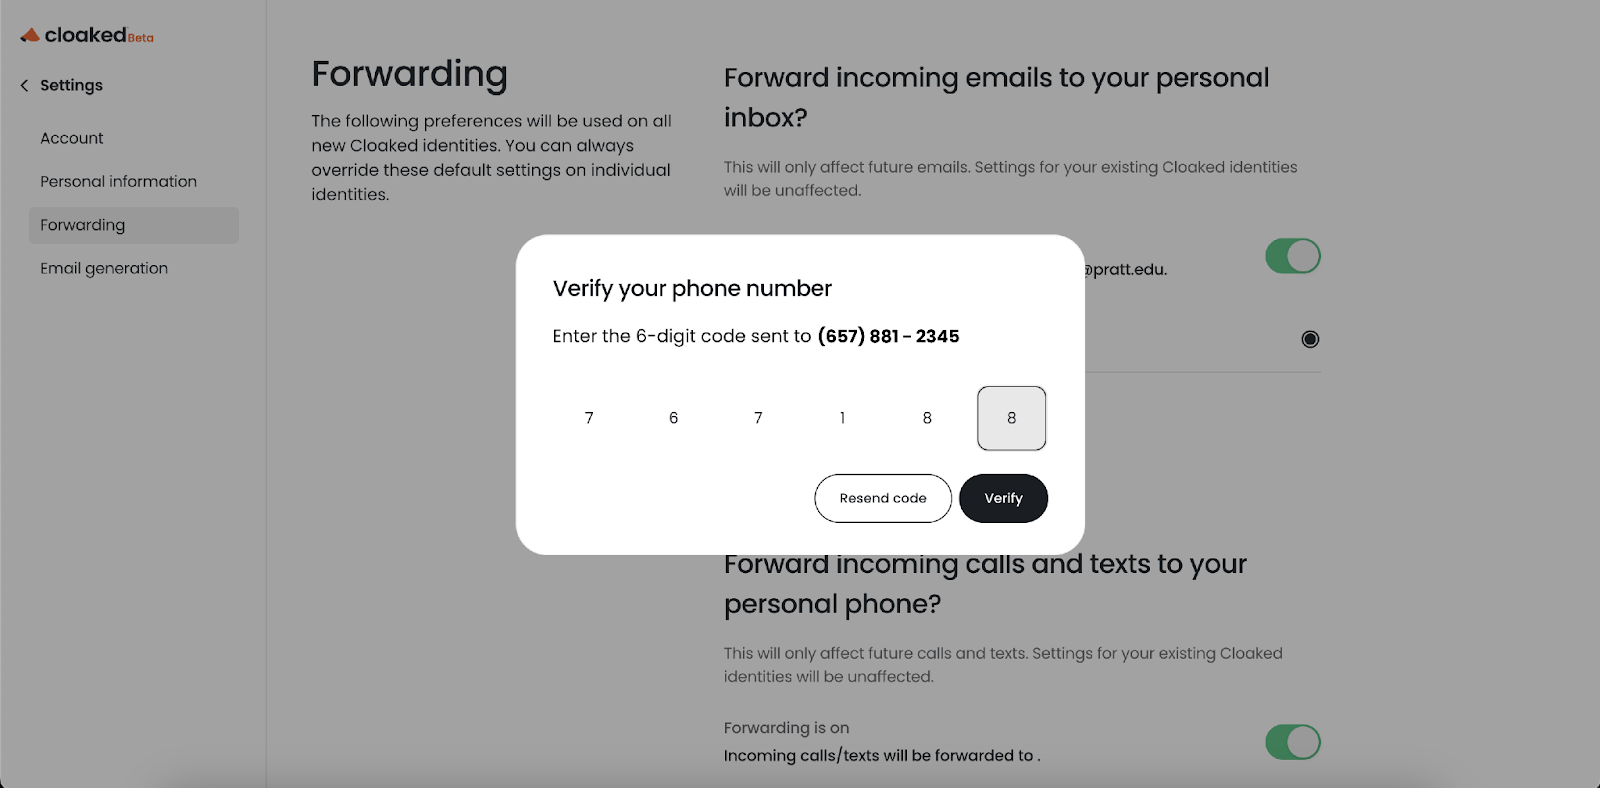
11. Select verify. All calls made and texts sent to your Cloaked-generated phone numbers will be forwarded to the phone number you provided.
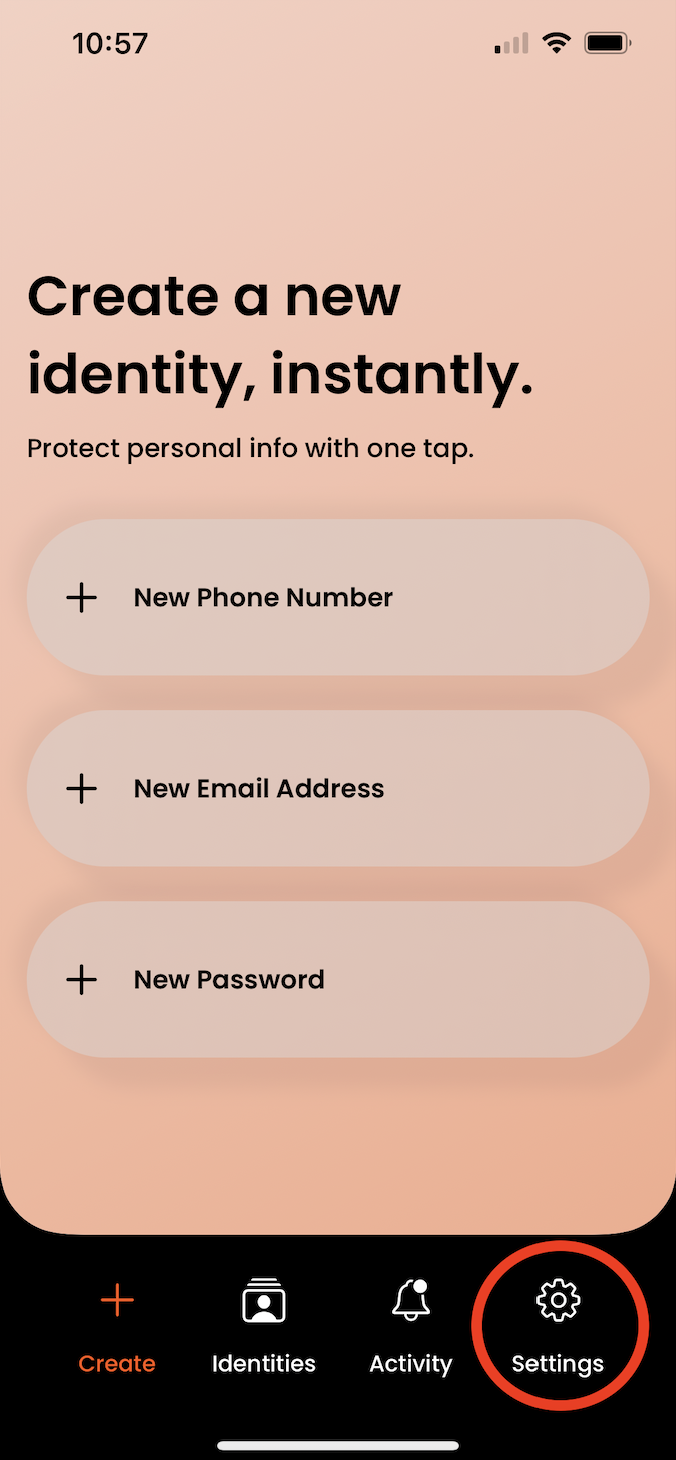
1. Open your Cloaked mobile app. Go to the “Settings” tab in the bottom navigation menu.
2. Select “Email and Phone Forwarding” from the “Permissions” section.

3. Turn on the toggle for “Add an email address” in the “Forward emails” section.
4. Enter the email address you’d like to forward emails to.

5. A verification code will be sent to the email address you provided. Enter the verification code.
6. Once you verify your email address, turn on the toggle for “Forward emails” and click “Save”.
7. Click on “Add a phone number” in the “Forward calls and texts” section.

8. Enter the phone number you’d like to forward calls and texts to.

9. A verification code will be sent to the email address you provided. Enter the verification code.
10. Once you verify your phone number, turn on the toggle for “Forward calls and texts” and click “Save”.